Roman Garb for the Summer
May 2022 - June 2022
After sweating it out on several hot days at my first Gulf Wars in 2022, I knew there was no way I'd manage to be a Viking during the Meridian summers. I have the utmost respect for those who can turn a look regardles of the heat, but I am not one of those people! Like so many others, it was time for Sefa's Hot (Roman) Garb Summer.
Because of who I am as a person, I did a bunch of research before I got started. I didn't know anything about historical Roman garb, and I like to at least start from a place of history before bringing in the anachronism. I've shared my many many many links below, but want to call out two that had a huge impact on this project. I didn't find Domina Arria Marina's fantastic & comprehensive paper, An Introduction to Roman Woman's Clothing, until I had already gotten started, but it is the first source I'd point any feminine-presenting person to if they wanted to work on a similar project. I also came across Dame Morwenna's amazing Introduction to Roman Clothing class on the Barony of Lion's Gate YouTube channel after I had already cut & stitched my chiton. It was SO GOOD I went back, ripped out the seams, and redid my work based on some of her suggestions. These two resources by themselves are enough to make lovely, affordable, comfortable, & historical Roman garb.
•••
Jump to Sefa's Chiton
Jump to Sefa's SCA Stola Dress
Chiton
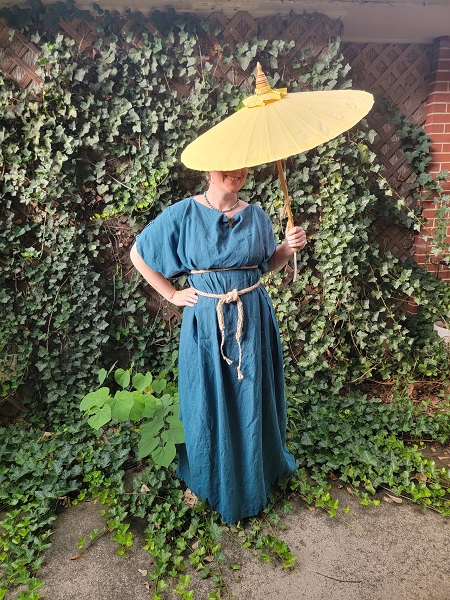
I knew I wanted to start with a tunica matrona, aka a gap sleeve tunic, aka a chiton. This was my very first piece of real garb that I made for myself! Yes, I made my Viking "Bed-chic" Dress, but this was going to be the real deal. I got some stunning teal mid-weight linen from Fabrics Store, but before I started cutting into it I fell back on the old-faithful Goodwill bedsheet mockup to figure out exactly what I wanted to do. I don't have photos of my mockup, but it was super helpful to figure out length & width as well as where I wanted the gaps along the top to be.
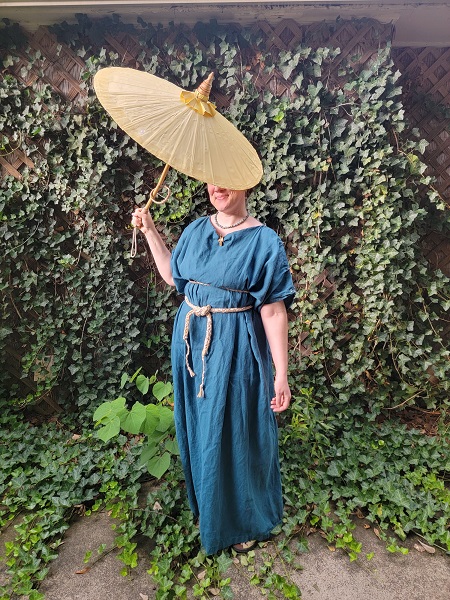
As I mentioned, I had already sewn the sides of the chiton when I watched Dame Morwenna's class and she suggested two things that made me start over. First, having the back piece of the chiton be smaller than the front automatically gives the neckline more fabric for a nice drape. Genius! You can see the difference between front and back widths in the picture below. I did add a pin to help the neckline drape lower as well.
I had already decided I'd be stitching together the sleeves instead of pinning them every time. The other suggestion of hers I incorporated was to gather the fabric a bit at those places when I sewed them together. Even just having some small pleats was a really lovely finishing touch! You can see an additional pic of the gathering & stitching in the gallery below.
Even though I sewed the sleeves together I wanted to have some kind of fastener for aesthetics. I found these delightful little brass fibulae by Irene Davis on Etsy & ordered enough for both my chiton and the stola dress below. They were nice & sharp when I got them, so I filed the ends down a bit to make hugs less painful for my friends. They still go through the linen just fine as long as I work with the fabric a bit. I think having them adds a lot to the final look.
•••
I made some accessories to go with my chiton, although they would work with my stola dress as well. Firstly, I wanted a palla! I knew I might not wear it much in the heat, so instead of making one in linen I found a good deal on some extremely bright yellow-orange Kona cotton. Pallas are, well, a LOT of fabric. This one is the full width of the bolt and 3.5 yards long, which is around the "correct" historical length. I may make a smaller palla in the future if I find a good deal on lightweight or gauzey linen. This one works well as a light wrap and a sun shade but is a) just too much fabric to wrangle and b) the cotton is a major lint magnet.
The other accessories I made were necklaces, since Roman upper-class women loved their bling. The fittings & wire are all from JoAnns, nothing special. I put more work into finding some more historiclly accurate beads. I ordered the blue-green melon beads & the frosted beads from Funky Pretty Beads. Roman women loved glass beads of all colors, melon beads, and pearls.
I wanted to make two, since layering necklaces was common. The blue-green melon bead necklace is just over choker length. The chain-linked necklace is longer and a very common Roman style based on historical findings. The lunula pendant, also from Irene Davis, is more anachronistic especially for my age. They were very common, but worn almost exclusively by young & unmarried women and girls. I loved it, though, so decided to include it in my interpretation.
•••
Here is the whole look all put together! I'm so happy with it, my very first piece of real garb! It is still a bit heavier and warmer than I thought it might be, but still quite comfortable on all but the hottest days.
SCA Stola Dress
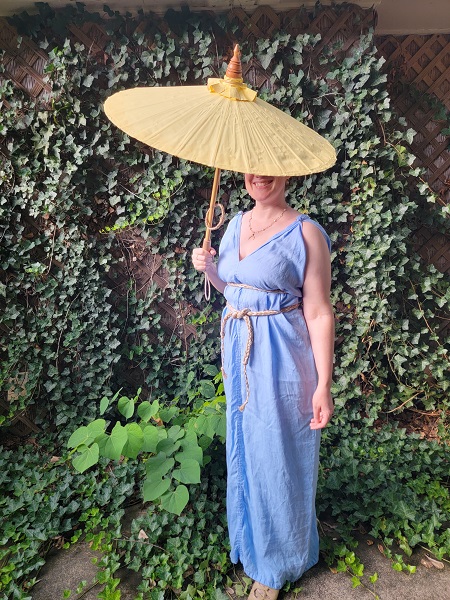
Compared to the chiton, this deligtful little stola dress was much faster & easier to make. It only took me a day, and that is with me hand-laying the seams & neck hem, vs the almost-all-machine-sewn chiton. This dress leans hard to anachronistic, because it is usually worn by itself! In theory I could wear this as a stola over a tunica, but stolas were historically made out of wool and the cut of the fabric is not quite right. The source of this dress is one hand-drawn pencil drawing that I've traced back to Ansteorran seamstress Cherie Weed based on feedback in Lady Madylyne Grey's blog post.
So, in the interest of being vain and staying cool, I got some breezy ligtweight linen and embraced this anachronistic SCA stola dress one-hundred percent. After wearing it, I'm already planning to make at least one more! As with the chiton, I made a bedsheet mockup to figure out lengths & widths ahead of time, and as before I don't have any pics of the mockup for you.
•••
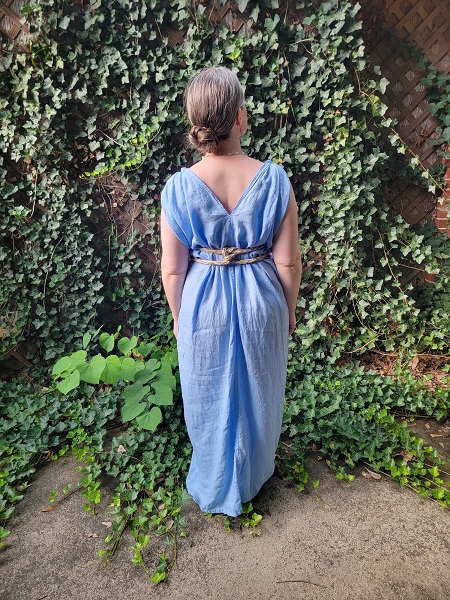
The basic idea behind the constrution of this dress is to make a tube as usual, both sides sewn together not all the way to the top, but instead of having the seams on the sides, you rotate the fabric so the seam is down the front & back.
That way you get a lovely v-neck in the front, and a nice drape across the shoulders, which you gather at the top points as seen here. I did sewn and faux-fibula-pinned pleats similar to my chiton, but you could do rosettes, buttons, or even wrap it with additional fabric to make something more like straps across the shoulders.
Here it is! It's really that simple! I can't tell you how comfortable this is on the hottest days, and it makes me feel even a little sexy, especially for yet another glorified rectangle! As I mentioned above, I already plan to make more of them. They are incredibly fast to make, comfortable, and attractive. Embrace the anachronism!
Sources and Additional Info
Domina Arria Marina's paper, An Introduction to Roman Woman's Clothing, which comprehensively covers everything from clothes to jewelry and cosmetics.
Dame Morwenna's amazing Introduction to Roman Clothing class on the Barony of Lion's Gate YouTube channel
Lady Aíbell ingen Dairmata's Garb and Patterns, especially her notes on Greek and Roman Garb for this project.
Barbara F. McManus's site on Roman Women's Clothing
Lady Madylyne Grey's blog post about Roman garb where I first saw the now-famous drapey stola dress, attributed to Ansteorran seamstress Cherie Weed.
Fjalladis' stunning Faustina project, which was my main inspiration for my chiton.
•••Here are links to the items in this post that I did not make:
Rope belt by Dixie Weaver, brass fibulae & bronze lunula moon pendant by Irene Davis, bird pin by Crafty Celts, sandals from Renboots, earrings by Handmade Earrings UK.


